
This page is intended to show clients how our support software works. Remember to always be cautious when giving anyone remote access to your computer: make sure you know who the other person is, and when in doubt, end the connection immediately, and call the person you believe it to be. When interacting only on the computer, don’t hesitate to call the other person and make sure that it’s really them. Many hacks occur due to people blindly giving someone access to their computer.
- One-Time Support from Advantage on Windows computers
- One-Time Support for macOS computers
- Installing the ConnectWise Connect for you Business
- Blocking or Removing Remote Access
One-Time Support from Advantage on Windows Computers
Please be aware, due to variation in browsers and operating systems, the following is only an example of what your screen may look like.
We have the ability to provide a one-time key to you so we can connect to your computer. There is a button located at the top of our home page which we will instruct you to click when providing one time access:

When you click on that link, it will take you to our remote-support software. The site will look like this:
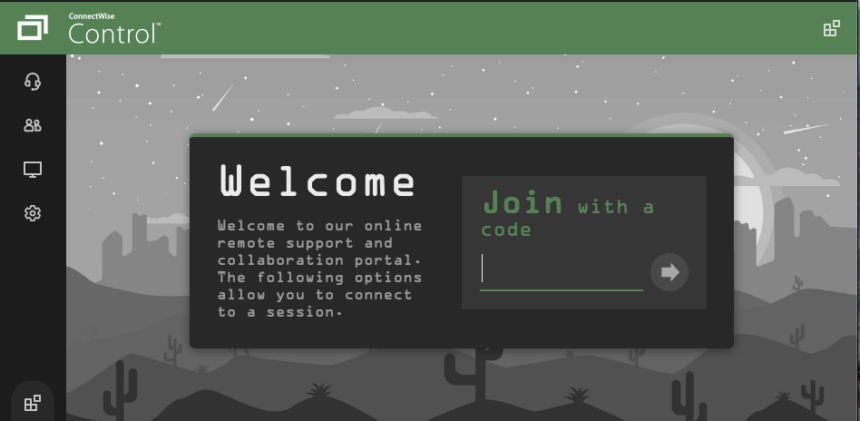
Your Technician will give you a unique code to enter into the website, will start a download of our one-time-use software. This software will stop running after we delete the session on our end, and will have to be restarted to connect to your computer in the future. Note: If you have an agreement with Advantage Computing for Computer Monitoring, this software is already installed and we should be able to assist you when you contact us immediately (See below).
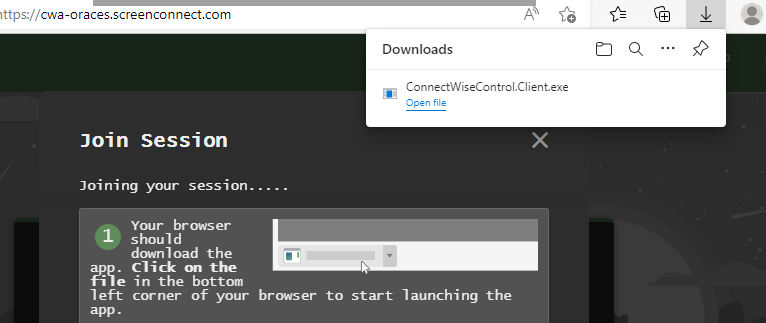
The example above is Windows 10, running the Edge Browser – this will look similar on Google Chrome. Click on the file, or choose “Open file”. This will pop-up an installation window that will proceed to request permissions to run:
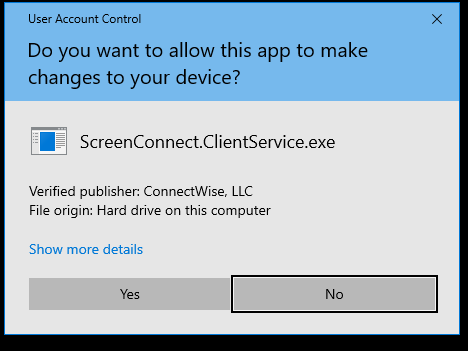
Once you click yes, a small icon will pop-up in your taskbar to indicate that ConnectWise ScreenConnect is running, and waiting for your technician to join: ![]()
The button will turn green when the technician has connected: ![]()
You will see a bar indicating we are controlling your computer:

One-Time Support for macOS computers:
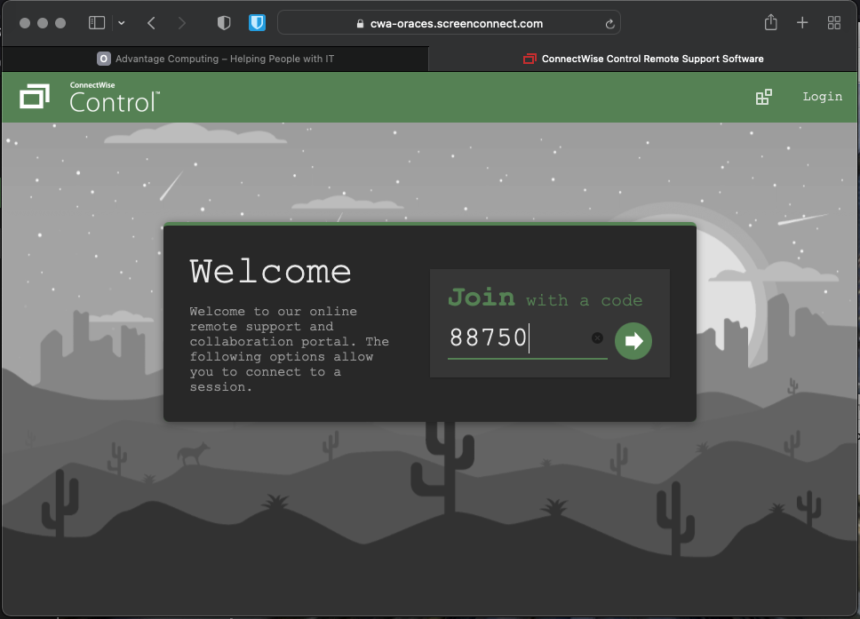
The process is the same as Windows systems, until we get to the download. Open Safari, and type in the code as before:
When you click the Green Arrow – you will see a popup with the following:
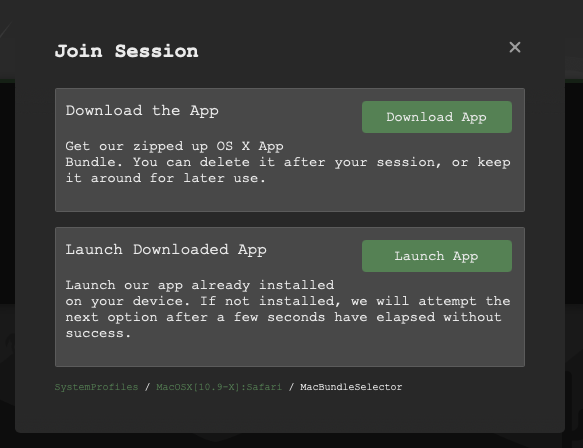
If you’ve previously installed and run the software within the last 30 days, you may be able to select “Launch App”. You most likely are installing the software for the first time, so you must go through the installation process and provide security permissions for us to support you. Click on “Download App”.
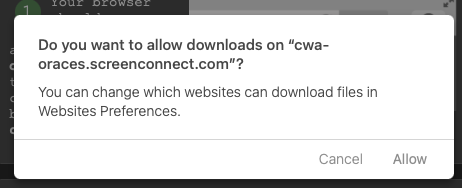
Depending on your settings, you maybe asked to give permission to the browser to access the Downloads Folder. If this is the case, click “Allow”. If you’ve already given this permission, you will not see this window.
Most computers are defaulted to save files from your browser directly to your downloads folder. Depending how you have this setup in macOS, this folder is typically accessible from the dock and you will see the following program downloading to your computer.

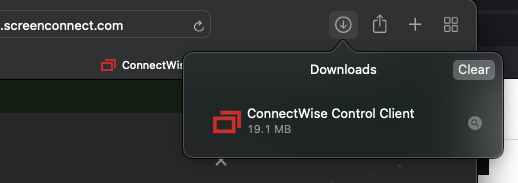
Otherwise, in Safari, you can click the Downloads Icon (circle with a down arrow) and see the program downloaded. Double-click to launch the program.
Once the program installs it will ask you to give permissions to access your computer. The following popup displays:
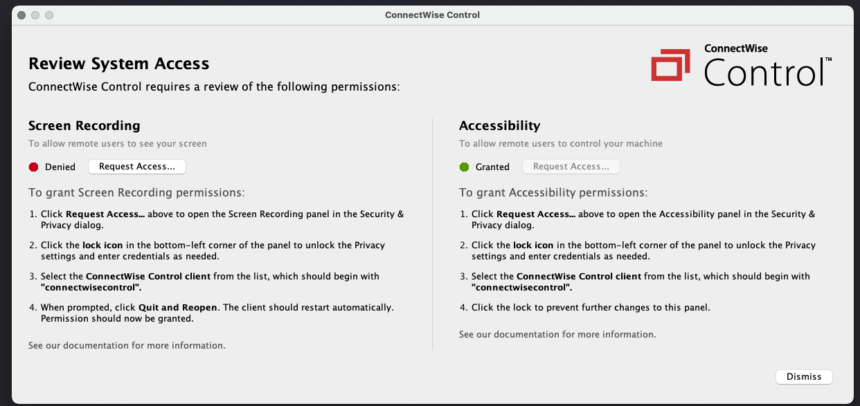
The following process must be taken (note these instructions are part of the pop-up window):
- Click on “Request Access…” under Screen Recording – this will launch the System Preferences (Apple Icon > System Preferences)
- Unlock the System Preferences by clicking the Lock Icon at the bottom left of the System Preferences and provide your password or fingerprint
- Select the “ConnectWise Control Client” from the list – it should begin with “connectwisecontrol” but may have additional letters at the end of the name.
- When prompted, click Quit and Reopen
- Follow the same process for the “Accessibility”
Due to macOS permissions, we can login to your computer without these settings set but we cannot see or control anything on your computer until you complete the above two tasks. Restarting the program will kick us out temporarily of your system.
Installing the ConnectWise Connect for you Business
In some instances, we may request that you install the Connect software for remote access on your computers manually. This may be due to the fact that you do not have a domain or Cloud Directory that we can use to push out software from. You may also not be under an agreement where our Automate software is installed on your systems, but you would like us to provide remote support.
We will send you a link to download the full version of ConnectWise Control – the process for PC’s and macOS is the same as the above after you’ve downloaded the program. You will not need to enter a code and the software will be permanently installed on your system for us to provide remote support.
Blocking or Removing Remote Access
One Time Access – after we complete our remote session during a One Time Access, the software will no longer be running on your PC. You can confirm the program is no longer installed by launching the “Apps & Features” option in the Settings, and uninstalling ConnectWise Control Client. On occasion we have found the software will continue to run on your macOS though we cannot connect, as it’s no longer linked to a session. A reboot should remove the software, but you can also kill the application manually if you do not want to reboot:
- Launch the Activity Monitor (You can use Spotlight to find the “Activity Monitor”)
- Find “ConnectWise Control Client” in the list
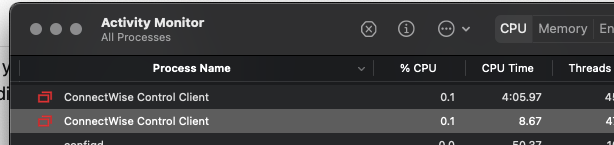
- Click the Circled X in the upper menu bar and select “Quit”
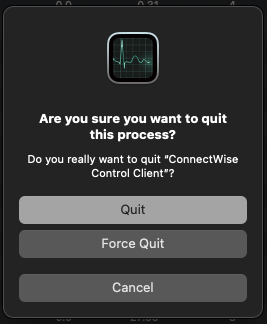
This should remove the program from the upper bar.